


PREPARING & PLANTING
What to do when your plants arrive
As soon as you can, open the box and remove all the packaging around the plants, and if they need a drink, water them well before allowing the excess to drain away freely. If they can't be planted straight away, place them in a sheltered spot, away from strong winds and bright midday sunshine. While a shed or garage might sound ideal for this, they're usually much too dark, so instead, try to find some lightly dappled shade beneath a tree, a screened porch, or the base of a north or east-facing wall to store them temporarily. Keep them well watered and get them in the ground as soon as you can.
GETTING READY TO PLANT
GET YOUR SOIL IN TIP TOP CONDITION
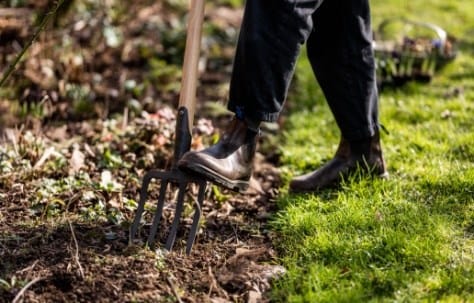
Hopefully you will have prepared your soil well after week 1, but if not, now's the time to get cracking. Good soil is the foundation of healthy plants so before you start to plant, make sure your soil is in five-star condition. Choose a day when the soil is not too wet, then start digging it over with a fork or spade, loosening it up to a depth of 8” or so and removing any weeds, debris, or larger stones that you find. Most soils will benefit from the addition of some fertiliser, so either mix in some granular fertiliser (following the manufacturer's instructions), or apply a topdressing of home-made compost or animal manure before lightly forking it in. Finally rake over the beds to break up any lumps and bumps and create a relatively level surface.
SETTING OUT YOUR PLANTS
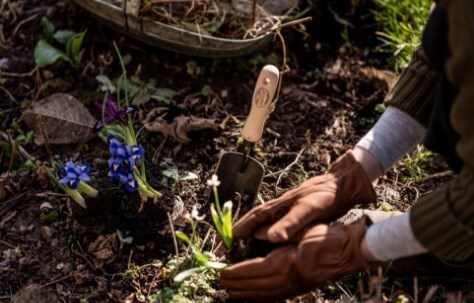
Before you start digging any planting holes, think about your planting plan and start placing the plants (pots and all) on top of the soil where you think they should go. While keeping in mind their eventual height and spread, give them enough space to develop without becoming overcrowded - you might be amazed at how much a plant can grow in one season! Also, avoid arranging them strictly by height, with taller plants at the back and shorter ones at the front. Instead, try mixing them up a little to make it more visually interesting. For example, if you're using some tall, airy plants (like ornamental grasses, taller verbenas, gauras or salvias), try to bring some of them towards the front of the border where they'll create a soft, hazy screen. Another technique is to weave your plants through the border, either by creating a ribbon-like effect, or forming triangles that disappear back into the border. Experiment with different layouts until you think you're happy, then walk around the border to view it from different angles. If the placement needs tweaking, now's the time to do it.
GETTING YOUR HANDS DIRTY
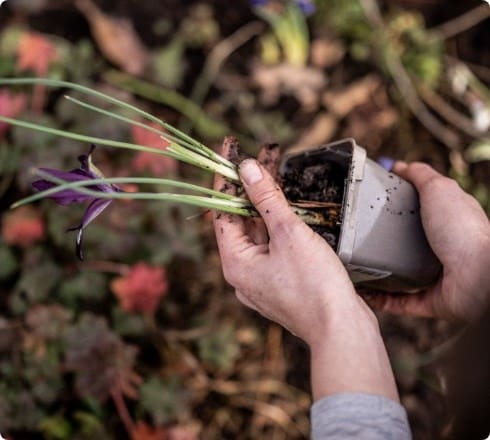
Once the plants have been watered, the soil's been prepared and you're happy with the layout of the plants, you're ready to start planting. Dig a hole about twice as wide as the plant's rootball, but don't dig too deeply as the plant will sink as the ground settles. Remove the plant from its pot by gently squeezing the sides of the pot, and while supporting the top of the rootball, tip them up and slip them out. Larger plants can be laid on their side before being gently eased out.

GENERAL PLANTING TIPS
MAKE SURE THE LEVELS ARE RIGHT
Gently tease out any roots that are circling around the bottom or sides of the pot, then backfill the planting hole with a little of the excavated soil before popping the plant in. Most plants need to be planted to the same depth as they were in their pot, so if you need help judging the correct level, lay a bamboo cane across the top of the planting hole so that it's lying flat across the surface of the surrounding soil. Use this as a guide to see if your plant needs to sit any higher or lower, and if necessary use a little more (or less) backfill until it looks right. Then, backfill around the sides, gently firming it down (not squishing!) to get rid of any air pockets and make the plant secure.
GIVE THEM A DRINK
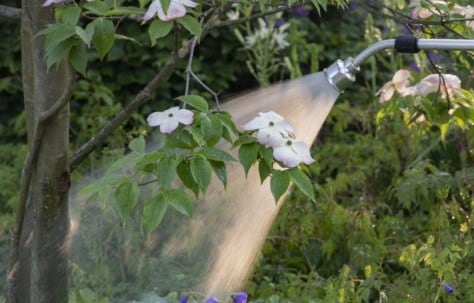
Once your plants are in the ground, they'll need a really good soak. Rather than dribbling the hose on them, it's far better to fill a watering can or bucket with a hose and gently tip the water round the plant. If you have a large area to cover, use a hose or sprinkler, taking the time to make sure that each plant gets a deep, refreshing drink.

PLANTING ON HEAVY (OR CLAY) SOIL
Create a larger planting hole, and then break up the base with a garden fork so that water can drain away in wet weather. Adding coarse grit to the bottom of the planting hole, or mixing some coarse grit into the garden soil for backfilling, will also help drainage.

PLANTING ON LIGHT (OR SANDY) SOIL
Make sure you enrich the soil with organic matter by adding garden compost to the ground and forking it through. This will not only add nutrients, but it will also help with the soil's ability to hold water.
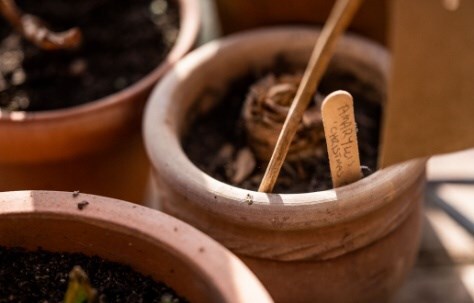
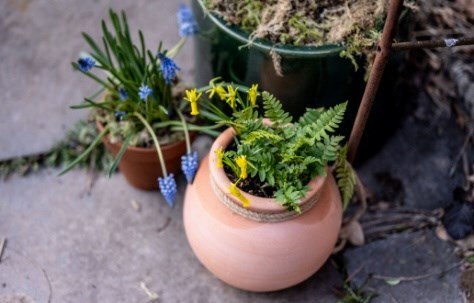
GROWING PLANTS IN POTS
GARDENING IN SMALL SPACES
If you're gardening in a small space and you don't have any borders, then pots offer the perfect solution. Also, as plants grown in pots will never get as big as they would if they were planted in the ground, it really is a win-win formula.
No matter what size your garden, it's also a great way to grow acid-loving plants, such as most Japanese maples, azaleas and rhododendrons if your soil has an alkaline or neutral pH. Just pop them in a pot filled with ericaceous compost and they'll flourish happily.
Loads of plants will do well in pots, but do remember that as their roots can't reach out into the surrounding soil to forage for their own water and nutrients, they'll need some extra care.
TOP TIPS FOR GROWING PLANTS IN POTS
The majority of plants will be happiest in a loam-based potting compost, which tends to hold the water better than peat-based composts. When peat-based compost dries out, it can be really hard to re-wet, so if this happens, add a few drops (no more!) of washing up liquid to a full watering can and slowly water it on - making sure it doesn't just run off the sides. Alternatively place the pot in a deep tray or saucer filled with water, and let the plant gradually soak it up. Keep on topping up the tray until the compost has fully rehydrated.
A wide-based container with straight sides is less likely to topple over in an exposed position.
Standing a pot on pot feet will create better drainage around the plants rootball, and it will also help protect the pot from being damaged by hard frosts in winter.

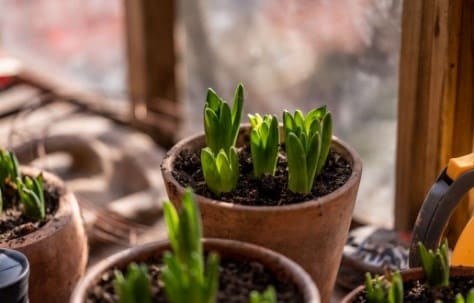
HOW TO PLANT IN A POT
Partially fill the pot with compost and place the plant on top, checking to see that the finished soil level will be around 1 - 2 inches below the pot's rim. This will ensure that your plants are displayed at their best, but the water (and compost) won't spill out over the edges every time you give them a drink. When the levels are right, fill in around the sides with more compost, gently firming it down as you work your way up. Immediately give the plant a thorough water.
ONGOING CARE FOR POTTED PLANTS
As potted plants dry out faster than those grown in the ground, you'll need to keep them well watered - especially during warmer weather. You'll also need to keep them well fed, and while your choice of fertiliser will depend on what you're growing, for the majority, a spring and summer application of a good, slow-release, general-purpose fertiliser such as Vitax Q4 will do the trick nicely - keeping them topped up with all the essential nutrients they need.
PLANTING KIT


CROCUS TIP
When you are setting out your plants, placing in oddly numbered clusters (3's, 5's, 7's etc) will always look more natural when creating informal swathes, while even numbers will work well if you want to create symmetry, frame a vista, or add definition to an entrance.
